

Stargazing: My first telescope
A couple of months ago I was in the Eifel area in Germany. Surrounded by forests and hills, completely dark, I looked up to the sky and the view was amazing. The milky way was stunning, and there were so incredibly many stars…
That is when I decided: I want a telescope!
Sky-Watcher Heritage 130p
After a lot of searching/reading I decided to go with an entry level Dobsonian telescope design. This type of telescope is usually cheaper to make, and easier to scale up; so for not a lot of money you get the most light-gathering which is very important in telescopes. It doesn’t have the convenience of a GOTO mount, which automatically points your telescope to interesting stars and star clusters, so I’ll have to learn to navigate on my own.
What I bought was the Sky-Watcher Heritage P130, a telescope which has a truss-tube design so it is easier to carry around and take with me to Germany.
After waiting for three weeks for clear skies (..sigh..) I had already hacked together a webcam so I could take pictures. This is how I created the following image of the moon:
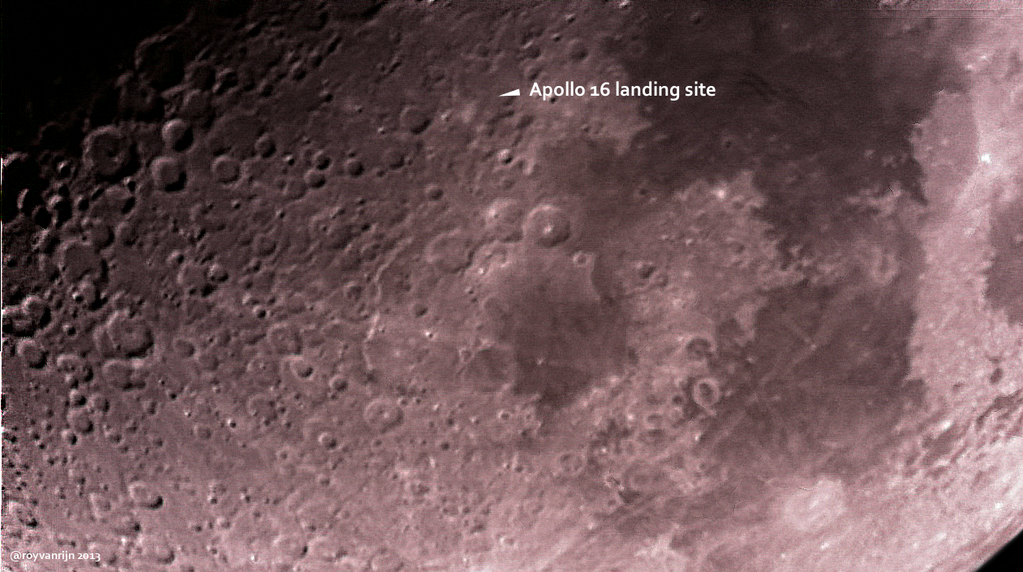
(Sky-Watcher Heritage 130P, modified Microsoft Lifecam HD-3000, stacked using RegiStax 6)
After playing around with this setup I decided I want to have 2x Barlow (which increases magnification 2 times again). I settled on an Ostara 1.25” achromatic 2x Barlow lens, which also has an T-adapter with EOS T-ring for my DSLR camera. Basically this turns my telescope into the lens of the camera. I’m very pleased with the results, the Barlow itself is great, but I’ve ditched the webcam completely and now only use my DSLR for astrophotographing.
Initially my results weren’t very good using the Barlow, the increased magnification pointed out another problem with my telescope: It needed collimation. Every once in a while the mirrors of a telescope need to be realigned. There are a lot of ways to do this, but the easiest and cheapest (free) method is using a DIY collimation cap. It is a cap with small hole in the middle, which I made from the Barlow dust cap. Now you can point the telescope to a bright wall and align the mirrors. This made another huge improvement to the image quality.
Initially when looking at Jupiter I could only see a disk with 4 planets in a row. But after collimation I can clearly see the bands on Jupiters surface. And after attaching the DSLR and filming a bit on magnified 640x480 (which results in a better picture after stacking then using 1080p for example), I stacked everything using RegiStax, this is the result:

(Sky-Watcher Heritage 130P, 2x Barlow, Canon 550D 640x480 cropped, stacked using RegiStax 6)