

Getting started: Arduino Mega
A couple of days ago I’ve received my Arduino Mega in the mail. Together with a breadboard, some plug-wires and Arduino-starters kit (with some resistors, capacitors, and a couple of sensors).
Arduino?
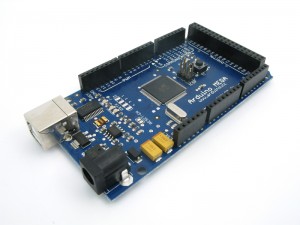
The Arduino is a handy little board with micro controller. It allows you to connect your computer using USB to the micro controller and easily program and upload the program to the board. I’m a very experienced programmer with almost no experience in electronics.
I know what a resistor is and what it does, but I have no idea how/when to use which resistor. But I’d love to learn more, maybe even build some toy robots in the end. A final goal would be to have a working humanoid with 20+ servo’s, but that goal might be a bit out of reach…
The examples
The first thing I’ve done after unboxing the Arduino was plugging it in my laptop and browsing to the arduino.cc website. There you can download the Arduino IDE.
In the ‘Learning’ section (http://arduino.cc/en/Tutorial/HomePage) you’ll find everything you need to get started. There are diagrams on how to wire everything into the breadboard, and there are also code examples.
Some stuff I made using the ‘Learning’ page:
- Blinking LED (the hardware Hello World, yay!)
- Slowly fading blinking LED
- Knight rider, KITT LED bar
- Tiny keyboard with 5 buttons
- Light reactive theremin
And some projects that aren’t on the example page, but could be made using the things I’ve learned:
- Extended keyboard with 5 buttons and LEDs!
- Light reactive LED bar (showing the amount of light in LEDs)
- Knock-sensor, LED shows when it ‘feels/hears’ a knock
All the above was made in a single evening! And there is much much more that you could make with the Arduino. I haven’t even started using servos and/or DC motors. The only problem left is lack of imagination!
For a programmer the code is very easy to understand, and the Arduino Programming Language used is closely related to the C/Java family.
/*
  keyboard

 Plays a pitch that changes based on a changing analog input

 circuit:
 * 3 force-sensing resistors from +5V to analog in 0 through 5
 * 3 10K resistors from analog in 0 through 5 to ground
 * 8-ohm speaker on digital pin 8

 created 21 Jan 2010
 modified 9 Apr 2012
 by Tom Igoe

This example code is in the public domain.

 http://arduino.cc/en/Tutorial/Tone3

 */

#include "pitches.h"

const int threshold = 10;    // minimum reading of the sensors that generates a note


// notes to play, corresponding to the 3 sensors:

int notes[] = {
  NOTE_A4, NOTE_B4,NOTE_C3 };

void setup() {

}

void loop() {
  for (int thisSensor = 0; thisSensor < 3; thisSensor++) {
    // get a sensor reading:

    int sensorReading = analogRead(thisSensor);

    // if the sensor is pressed hard enough:

    if (sensorReading > threshold) {
      // play the note corresponding to this sensor:

      tone(8, notes[thisSensor], 20);
    }
  }
}
The language has borrowed a lot of syntax from C, but there are some tricky issues (in the eyes of a programmer). For example:
int sensorValue = analogRead(A0);
String stringThree = "Sensor value: " + sensorValue;
Serial.println(stringThree);
This little piece of code above gives unpredictable results because ‘stringThree’ never got an initial value before you started concatenating different data types. Instead you’ll have to do:
int sensorValue = analogRead(A0);
String stringOne = "Sensor value: ";
String stringThree = stringOne + sensorValue;
Serial.println(stringThree);
Weird…! But I really suggest trying out the Arduino, give it a chance and you’ll probably like it and learn a lot about electronics and microcontrollers.